Harvesting Amaranth Plants: When Is Amaranth Harvest Time

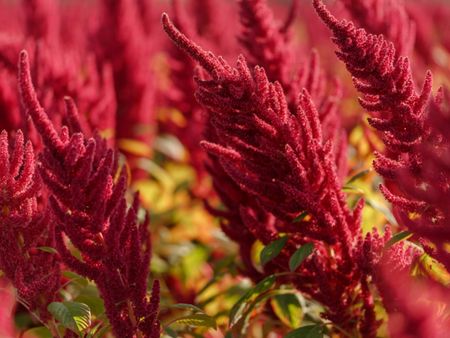
If you are growing amaranth, it’s no wonder, with its nutrient rich greens and seeds. Plus, the seed heads are truly lovely and add a unique focal point to the landscape. So when the amaranth seed heads are plainly visible, is it time to harvest the amaranth? How do you know when to harvest amaranth? Read on to find out how to harvest amaranth and other information about harvesting amaranth grains.
Harvesting Amaranth Plants
Amaranth is a plant that falls into one of four categories: grain, vegetable, ornamental or weed. The differences are more or less cultural preferences, as all types are edible and highly nutritious. Both the greens and seeds are edible, with the greens tasting somewhat like spinach, and the seeds milled into flour or eaten much like quinoa with a similar protein punch. While of the 60-70 species of amaranth, 40 are considered native to the Americas, you are likely growing one of three: A. hypochondriacus (Prince’s Feather), A. cruentus (Purple Amaranth) or A. tricolor (Tampala, which is grown chiefly for its leaves). The seeds from the first two are off-white to pale pink, while the latter is black and shiny. Harvesting amaranth grains from all types of amaranth is okay but, in some arenas, mixing the black seed in with the paler grains is considered to be a contaminant, which is purely cosmetic in thinking since they are all edible.
When to Harvest Amaranth
You can begin harvesting amaranth plants for greens almost immediately. Young greens are perfect for salads, while older greens are better when cooked like spinach. Seeds ripen about three months after planting, usually in the mid- to late summer, depending on your climate and when you planted. They are ready to harvest when they begin to fall from the flower head (tassel). Give the tassel a gentle shake. If you see seeds falling from the tassel, it’s amaranth harvest time.
How to Harvest Amaranth
Now that you’ve ascertained that the seed is ready to harvest, you can either cut, hang dry the plants and then separate the seeds from the chaff, or wait to cut the tassel from the plant on a dry day, 3-7 days after a hard frost. By then, the seeds will definitely be dry. However, the birds may have gotten to a lot more of them than you will. Another way to harvest the amaranth is once the seeds begin to readily fall from the tassels, take the seed heads in your hands and rub them over a bucket to catch the seed. The latter method will require multiple harvests in this manner to remove any remaining seeds as they dry. It also lessens the amount of debris and chaff that needs to be removed. Regardless of how you harvest your amaranth seeds, you will need to winnow out the chaff from the seed. You can do this by means of successive sieves; stack different sized sieves from smallest on the bottom to the largest at the top and shake the seeds and chaff through them. Once you take your sieve stack apart, you will be left with one that contains only seeds. You can also use the ‘ramp’ method for removing the seeds from the chaff. This is also referred to as the ‘blow and fly’ method and should really be done outside, lest you want a mess in your kitchen. Set a cookie sheet flat on the ground and using a cutting board, create an angled ramp. Pour the seed onto the cookie sheet and blow towards the ramp. Seeds will roll up the ramp and back down, while the chaff will blow beyond the cutting board. Once you have harvested the amaranth, it needs to be completely dried before you store it; otherwise, it will mold. Leave it on trays to dry in the sun or inside near an indoor heating source. Stir the seed around on occasion until they are completely dry. Store them in an air tight container in a cool, dry area for up to 6 months.
Gardening tips, videos, info and more delivered right to your inbox!
Sign up for the Gardening Know How newsletter today and receive a free copy of our e-book "How to Grow Delicious Tomatoes".

Amy Grant has been gardening for 30 years and writing for 15. A professional chef and caterer, Amy's area of expertise is culinary gardening.
-
 Best Tomatoes For Containers: 10 Tastiest Varieties For Plentiful Produce In Compact Areas
These are the best tomatoes for containers that prove you don't need to have a large space or elaborate garden to grow delicious produce.
By Bonnie L. Grant
-
 Ultimate Potted Flowers For Spring: 8 Brilliant Blooming Options for Spring Containers
Celebrate the most uplifting of seasons with the most dazzling container flowers imaginable. Here, we present some of the loveliest potted flowers for spring…
By Tonya Barnett

