Homemade Bumblebee Nests: Making A Home For Bumblebees


“To make a prairie it takes a clover and one bee. One clover and a bee, and revery. The revery alone will do, if bees are few.” Emily Dickinson. Sadly, bee populations are declining. Bees are becoming few in numbers. The way things are heading, bees and prairies may someday just be things we see in our daydreams. However, like Emily Dickinson’s one bee, each one person who takes steps to help our pollinators is also helping our prairies and the future of our planets. Honeybee decline has made many headlines in the past few years, but bumblebee populations are declining too. Continue reading to learn how you can help by making a home for bumblebees.
Bumblebee Shelter Info
It may surprise you to learn that there are over 250 species of bumblebees, which mostly live in the Northern Hemisphere, though some are found throughout South America, too. Bumblebees are social creatures and live in colonies, like honeybees. However, depending on species, a bumblebee colony only has 50-400 bees, much smaller than honeybee colonies. In Europe, North America and Asia, bumblebees are very important in the pollination of agricultural crops. Their decline and loss of safe habitats will have devastating effects on our future food sources. In spring, queen bumblebees come out of hibernation and begin searching for a nest site. Depending on species, there are above ground nesters, surface nesters or below ground nesters. Above ground nesting bumblebees usually make their nests in old bird boxes, crevices in trees or in any suitable site they can find several feet above the ground. Surface nesters select nest sites that are low to the ground, such as a pile of logs, cracks in house foundations or other out of the way locations. Below ground nesting bumblebees often nest in the abandoned tunnels of mice or voles.
How to Make a Bumblebee Nest
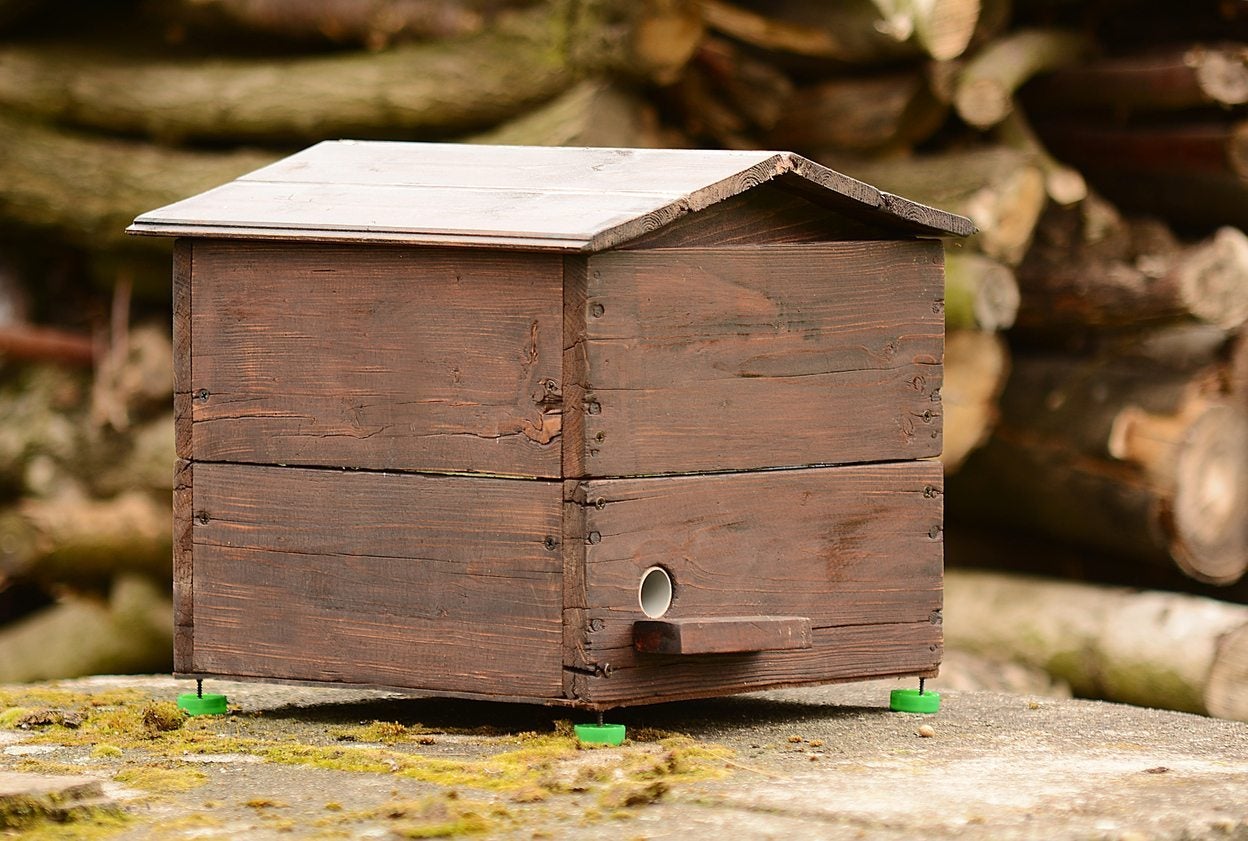
The bumblebee queen seeks out a nesting site that already has nesting materials, such as twigs, grasses, straw, moss and other garden debris in it. This is why abandoned nests of birds or small mammals are often selected as bumblebee nesting sites. Gardeners who are too tidy about garden debris may actually inadvertently deter bumblebees from nesting in their yards. Bumblebees also prefer a nesting site that is in a partially shaded or shaded location, which is not frequented by people or pets. The queen bumblebee needs to visit about 6,000 flowers to attain the nectar she will need to arrange her nest, lay her eggs and maintain the proper temperature in the nest, so a bumblebee nest needs to be located near plenty of flowers. An easy way to give bumblebees shelter is to leave old bird nest boxes or bird nests in place for bumblebees to move into. You can also make bumblebee nesting boxes with wood. A bumblebee nesting box is very similar in construction to a bird nesting box. Usually, a bumblebee box is 6 in. x 6 in. x 5 in. (15 cm. x 15 cm. x 8 cm.) and the entrance hole is only about ½ inch (1.27 cm.) in diameter or less. A bumblebee nesting box will also need to have at least two other smaller holes near the top for ventilation. These nest boxes can be hung, set at ground level, or a garden hose or tube can be fixed to the entrance hole as a faux tunnel and the nest box can be buried in the garden. Be sure to fill it with organic nesting material before putting it in position. You can also get creative when creating a bumblebee house. One brilliant idea I came across was using an old tea pot – the spout provides a tunnel/entrance hole and ceramic tea pot lids usually have vent holes. You can also create a bumblebee house from two terra cotta pots. Glue a piece of screen over the drain hole in the bottom of one terra cotta pot. Then attach a piece of hose or tubing to the other terra cotta pot’s drain hole to act as a tunnel for bumblebees. Put nesting material in the terra cotta pot with the screen, then glue the two pots together lip to lip. This nest can be buried or half buried in an out of the way garden spot with plenty of flowers. Additionally, you can also bury a section of hose in the soil so that the center of the hose is buried but with both open ends above the soil. Then place an upside down terra cotta pot over one side of the open hose end. Place a roof slate over the pot’s drainage hole to allow for ventilation but also keep rain out.
Gardening tips, videos, info and more delivered right to your inbox!
Sign up for the Gardening Know How newsletter today and receive a free copy of our e-book "How to Grow Delicious Tomatoes".