Milk Jug Winter Sowing: How To Start Seeds In A Milk Jug

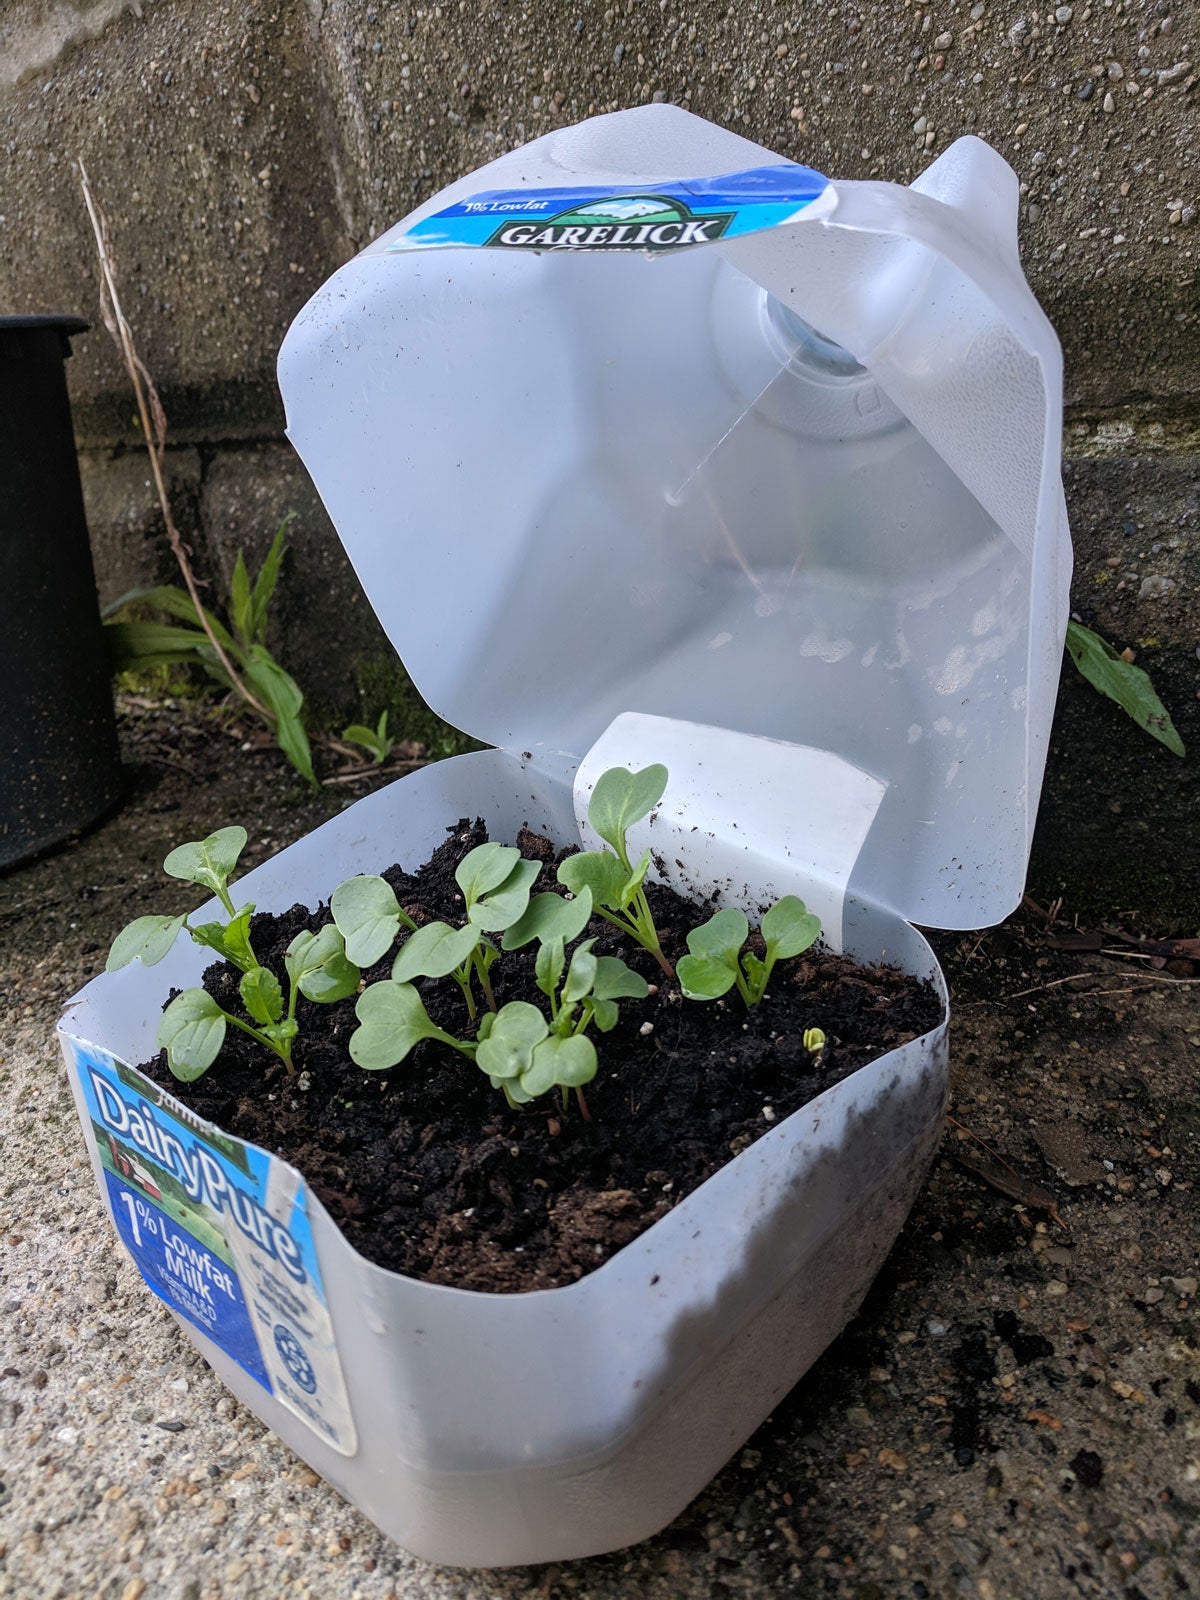
For gardeners, spring can’t come soon enough and many of us have been guilty of jumping the gun and starting our seeds way too early inside. A terrific method for starting seeds that can be done earlier is milk jug winter sowing, which is basically sowing seeds in a milk jug that becomes a mini greenhouse. Keep reading to learn about milk jug seed pots.
About Sowing Seeds in a Milk Jug
Sure, you can recycle plastic milk jugs, but a better use for them is to repurpose them for milk jug winter sowing. This is a low-maintenance way to start seeds earlier than you thought possible. The sealed jug acts as a greenhouse that allows the seeds to germinate several weeks ahead of direct sowing.
The plants are sown in their mini greenhouse outside, eliminating the need to harden seedlings off. The seeds also go through a period of stratification which is necessary for some types of seeds to germinate.

Treat someone special to everything they'll need to grow stunning flowers and delicious organic home produce – all from tried-and-trusted brands.
How to Make Milk Jug Seed Pots
Milk jugs are usually the preferred vehicle for this type of sowing, but you may also use any semi-transparent plastic container (apparently the semi-opaque milk containers work as well) that has room for at least 2 inches (5 cm.) of soil and at least 4 inches (10 cm.) for growth. Some other ideas are juice jugs, strawberry containers, and even rotisserie chicken containers.
Rinse out the milk jug and punch four drainage holes into the bottom. Cut the milk jug horizontally at the bottom of the handle working your way around the circumference; leave an inch (2.5 cm.) or so to act as a hinge at the handle.
How to Sow Seeds in a Milk Jug
Use either a soilless seed starting mix or a potting mix that has been sifted to remove any large chunks of bark, twigs, or rocks and has been amended with perlite, vermiculite, or, ideally, sphagnum moss. If using a potting mix, make sure it has no fertilizer which can burn the seedlings. The most ideal seed starting medium for milk jug winter sowing is 4 parts screened aged compost to 2 parts perlite or vermiculite, and 2 parts peat moss.
Fill the bottom of the jug with 2 inches (5 cm.) of slightly damp medium. Plant the seeds according to the package instructions. Replace the top of the milk jug and seal it as best you can with tape; packing tape works best. Place the containers in an area of sun outdoors.
Gardening tips, videos, info and more delivered right to your inbox!
Sign up for the Gardening Know How newsletter today and receive a free copy of our e-book "How to Grow Delicious Tomatoes".
Keep an eye on the containers. If temperatures dip, you may want to cover the jugs with a blanket at night. Water the seedlings lightly if they dry out. When temperatures hit 50-60 F. (10-16 C.), especially if it is sunny, remove the tops of the jugs so the seedlings won’t fry. Cover again in the evening.
When the seedlings have produced at least two sets of true leaves, it is time to transplant them into individual containers to allow the roots to grow and then transplant them into the garden.
What to Sow in Milk Jug Seed Pots
Seeds that require cold stratification, hardy perennials and hardy annuals, and many native plants can be started in milk jug seed pots in early to mid-winter.
Cold crops like brassicas, native plants and wildflowers that require short periods of stratification, heirloom tomatoes, and many herbs can be started using this method in late winter through early spring. Tender annuals and summer vegetable crops that require warmer temps to germinate and don’t reach maturity until late summer (tomatoes, peppers, basil) can also be started in milk jugs during this time or later.
Information on seed packets will also help you to figure out which seeds should be planted when. ‘Direct sow after all danger of frost has passed’ becomes code for planting in late winter/early spring, and ‘start indoors 3-4 weeks before average last frost” means sow in milk jugs in mid to later winter, while “sow 4-6 weeks before average last frost” indicates planting time in early to mid-winter.
Lastly, but most importantly, remember to clearly label your pots as you sow them with waterproof ink or paint.

Amy Grant has been gardening for 30 years and writing for 15. A professional chef and caterer, Amy's area of expertise is culinary gardening.