Tips On Potting Orchid Keikis: How To Plant An Orchid Keiki

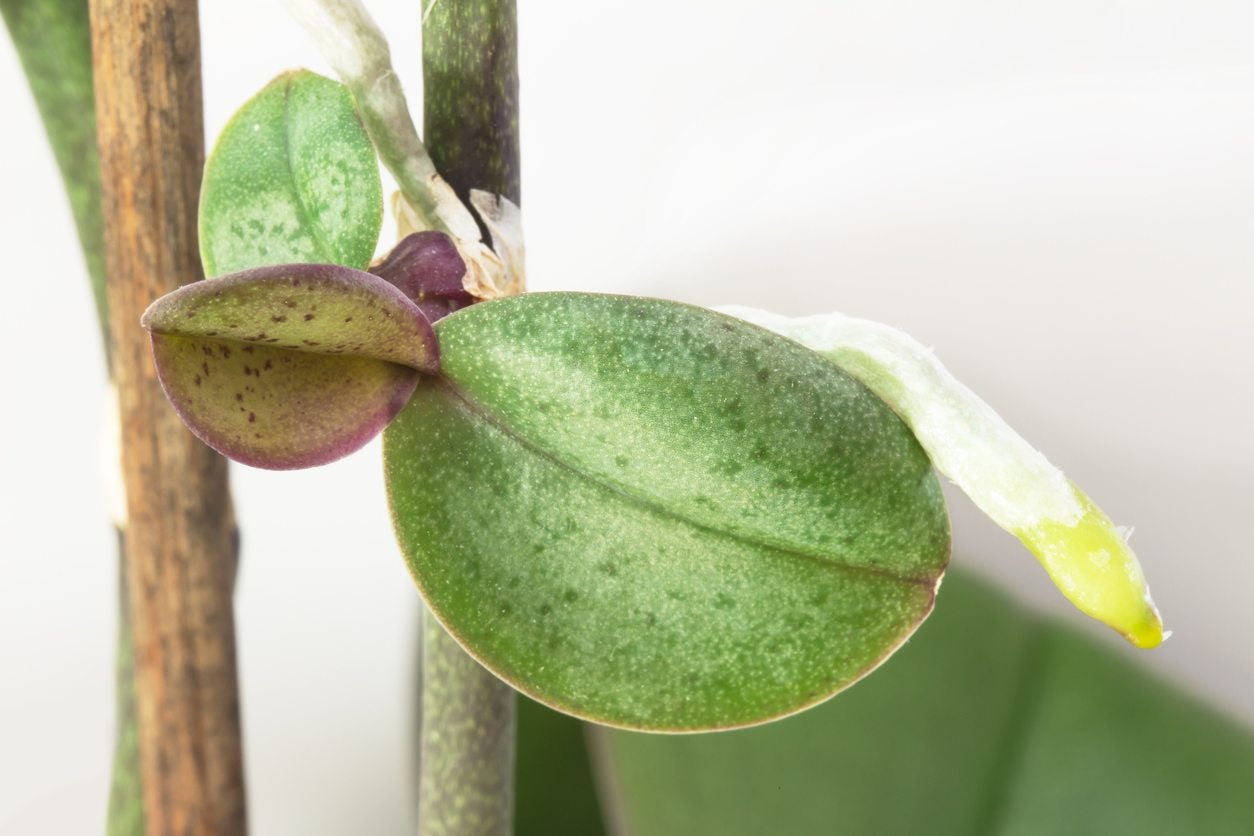
Propagating orchids from keikis is a lot simpler than it might sound! Once you’ve identified a keiki growing on your orchid, there are only a few simple steps required to replant your new baby orchid successfully. (For more information on keiki’s in general, see this article on keiki care.)
Initial Steps for Potting Orchid Keikis
Removing your keiki too early will significantly decrease its chances of survival. Before removing the keiki, make absolutely sure that the plantlet is old enough to be taken from its mother and that the root system is quite healthy. Success in potting orchid keikis requires that the keiki have at least three leaves and roots that are 2 to 3 inches long (5-8 cm.), ideally with root tips that are dark green. Once you have established that your keiki is the right size, you can carefully remove it using a sharp, sterilized blade. You want to make the cut at the base of the plantlet and remember to use a fungicide on the cut made to your mother orchid to protect the plant from infection.
How to Plant an Orchid Keiki
Now you are ready to tackle the actual orchid keiki planting. You have the option to repot the keiki in its own pot, or you can plant it in the pot with its mother. Planting with the mother for the first year of its life can be advantageous because the adult plant will help to regulate the proper soil conditions for the new plant. However, keikis can also thrive in their own containers. If you want to use a new pot, it should be small, 4 inches (10 cm.) is ideal. The planting medium should be sphagnum moss or fir bark, but not potting soil or regular peat moss. If you have a preferred orchid growing mix, check to make sure that it drains well. Potting orchid keikis is similar to potting any other plant. Filling the bottom half to two-thirds of your pot with the growing medium, carefully place the keiki inside --roots pointing down-- and secure the plant in place by filling in the remaining space with more growing medium, gently pressing down around the plant. Be sure that the roots are covered but the leaves are exposed. If you are using sphagnum moss, pre-moisten the medium but don’t saturate it. You can place some of the moss in the pot and then wrap the keiki with more moss until you have a ball slightly larger than the size of the pot. You can then set the ball into the pot and pack it down to stabilize the plant. Be sure that the potting medium is drying out between waterings-- too much water will cause the roots to rot. Keep your keiki out of direct sunlight after planting until you notice a bit of new growth and increase the exposure to direct sunlight a bit at a time. Now you should have a basic understanding of how to plant an orchid keiki!
Gardening tips, videos, info and more delivered right to your inbox!
Sign up for the Gardening Know How newsletter today and receive a free copy of our e-book "How to Grow Delicious Tomatoes".
-
 Looking For Plants To Give You The Soft And Fuzzies? Try These 5 Fuzzy Leaf Plant Options
Lovers of texture, drama, silver foliage and tactile plants will adore these special sensory garden additions. These fuzzy leaf plant options will leave you all aglow
By Susan Albert
-
 Get Ready For A Summer Of Hummers! Grow These Full Sun Hummingbird Plants and Flowers
If you’re lucky enough to enjoy a sunny backyard, make sure you are maxing out on your pollinator opportunities and grow these full sun hummingbird plants and flowers
By Tonya Barnett