Grow More Roses From Cuttings With This Easy Method For Foolproof Results
Learn the easiest method for propagating roses at home. Follow our step-by-step guide and you can "cut and forget" until new growth appears next spring.
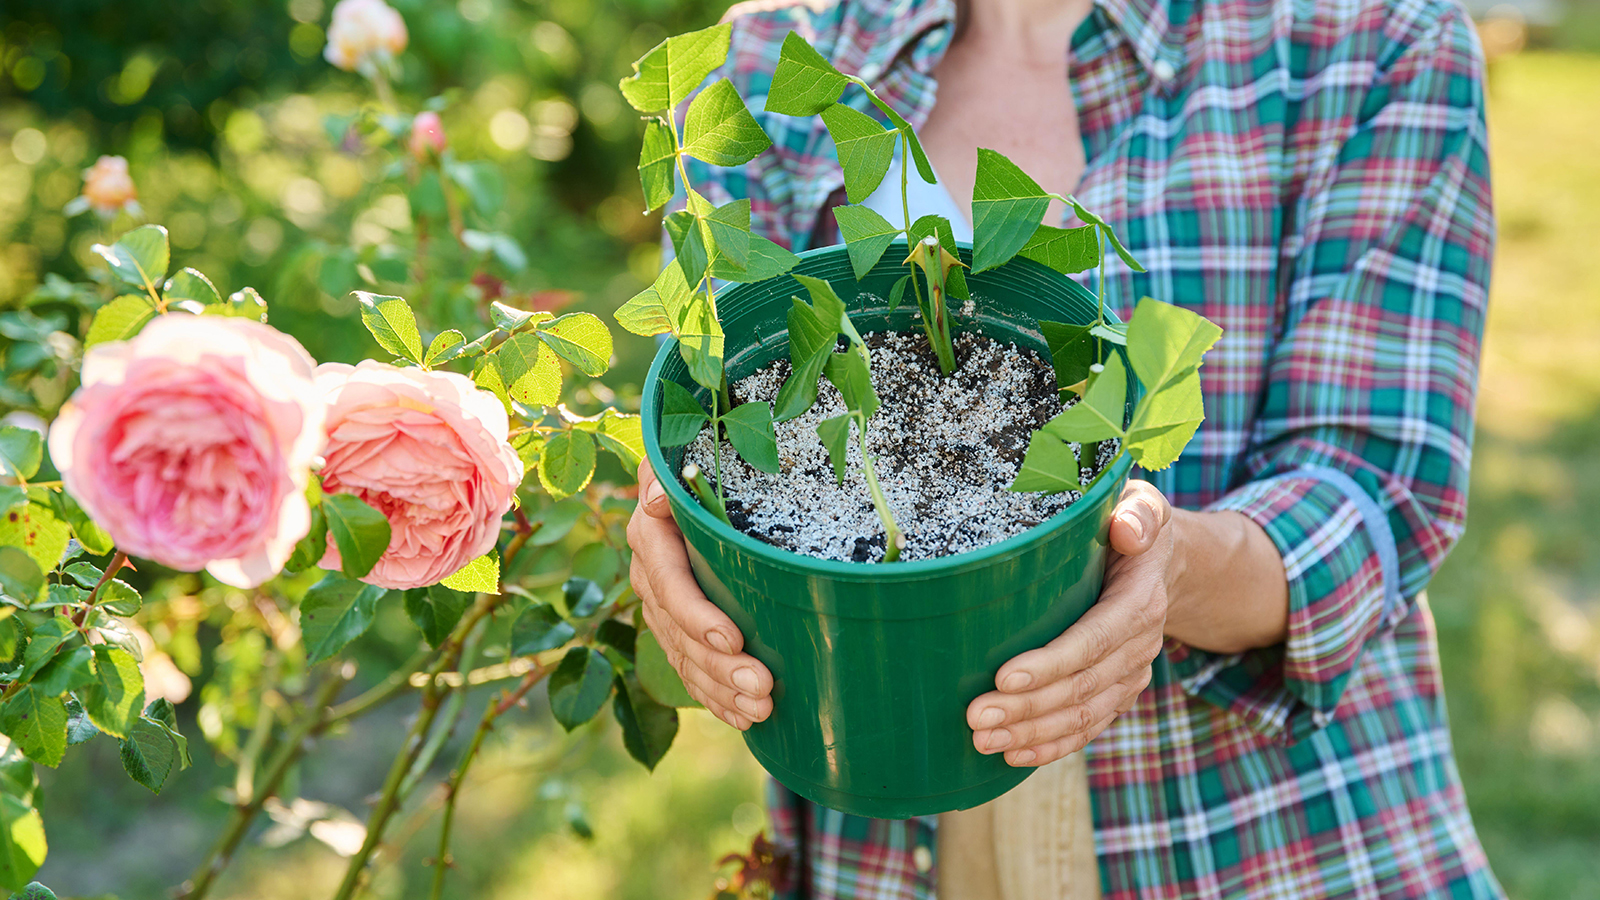

Propagating roses from cuttings is a wonderful way to expand your plant collection and even start a rose garden for free. These prized shrubs can be expensive to buy, so learning how to take cuttings is one of the best thrifty gardening ideas to populate your garden beds and pots.
Unfortunately, many gardeners have tried and failed to grow roses from cuttings, leading them to believe it is a complicated endeavor. However, once you learn the easiest method, you'll be a step closer to knowing all the secrets of expert rose growers. All you need is time and patience.
Inexperienced gardeners often make the mistake of taking rose cuttings too early in the growing season. Young "softwood" cuttings offer the quickest route of propagating roses, but it is usually the least successful method for home growers. Softwood rose cuttings are delicate and need a lot of TLC to develop into successful plants.
Semi-ripe cuttings taken in late summer and early fall are much easier to propagate. These use the current season’s growth after it has had a chance to mature and strengthen, resulting in healthier plants.
Hardwood cuttings taken later in the fall are even more robust. They grow slowly but need no protection and can largely be ignored until the spring. Semi-ripe and hardwood cuttings can both be propagated in the same way.
Bear in mind that growing roses from cuttings is a numbers game – you can’t just do one or two and expect them to succeed. Take several good-quality cuttings from each plant, follow our step-by-step guide, and you will almost certainly triumph.
1. Take Your Cuttings
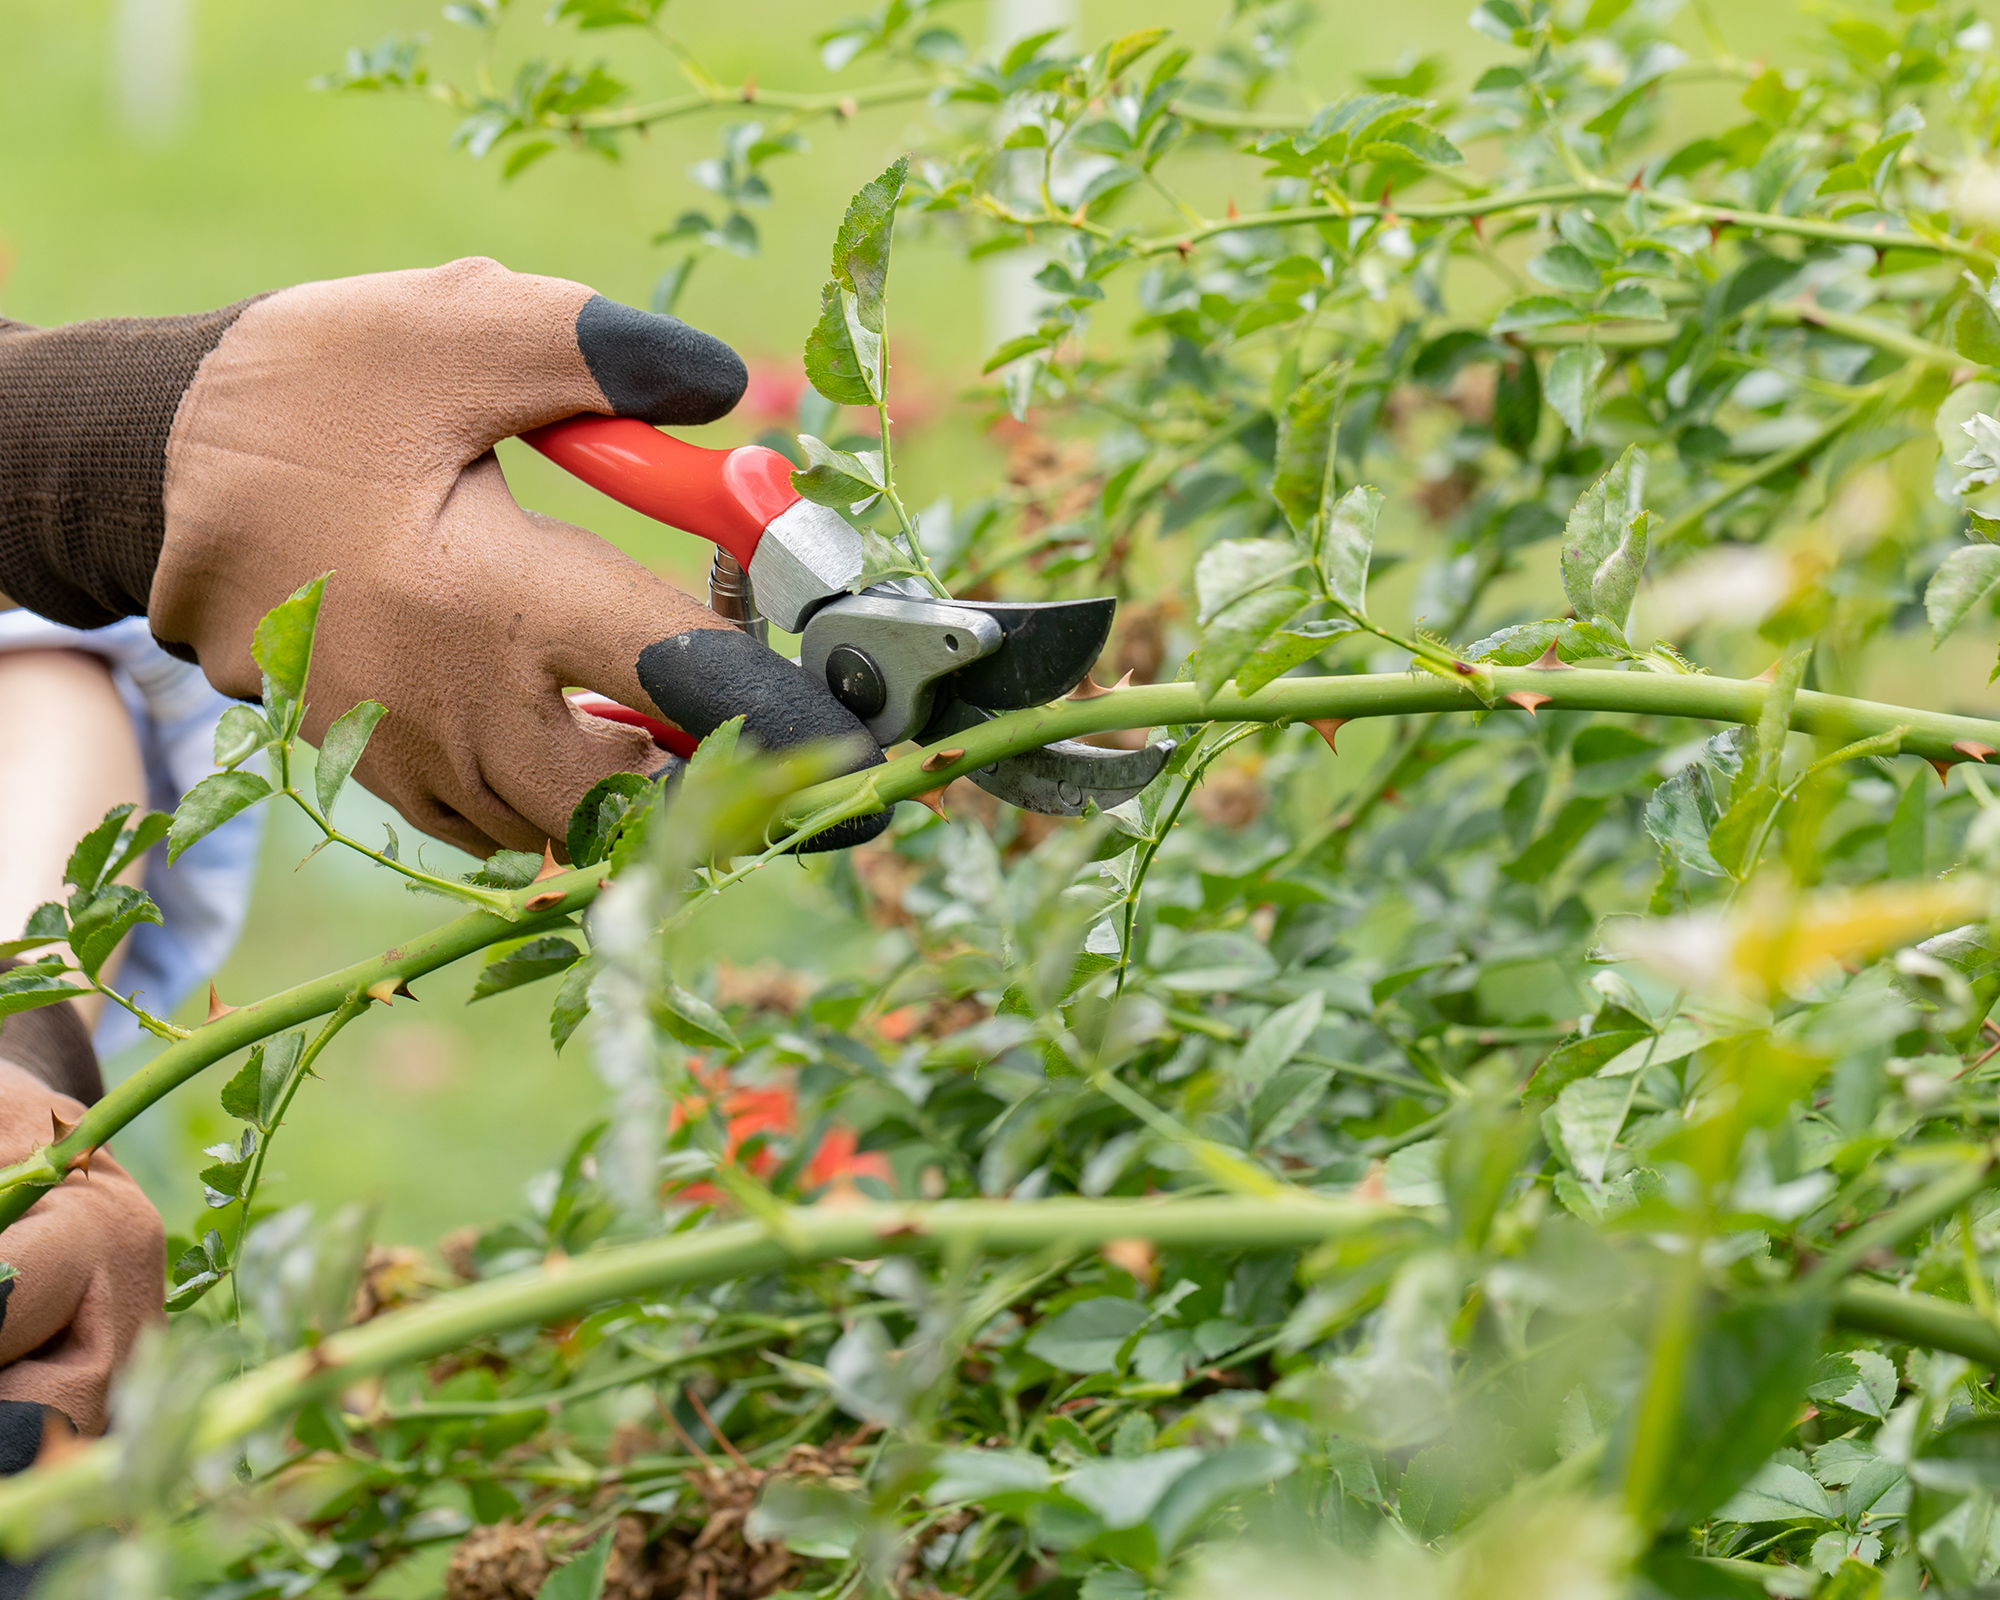
Take rose cuttings early in the morning while there is still moisture and fullness in the stem.
Gardening tips, videos, info and more delivered right to your inbox!
Sign up for the Gardening Know How newsletter today and receive a free copy of our e-book "How to Grow Delicious Tomatoes".
When selecting stems to cut, the growth must be young from the current year. If unsure, try breaking off a thorn to see if it comes off easily and cleanly; if so, it’s ripe.
Choose a nice straight stem about 8-10 inches (20-25cm) long. Ensure the stem is not damaged or diseased. It is fine if it has a spent flower at the end. Ideally, it should be the thickness of a pencil. If the stems are slimmer, just choose the best available, as a spindly stem is less likely to grow into a strong plant.
Using sharp, sterilized hand pruners, take at least three cuttings from the plant.
If you are not potting up your cuttings immediately, then seal them in a Ziploc bag to retain freshness and moisture. Pot them within 24 hours.
2. Prepare Cuttings For Planting
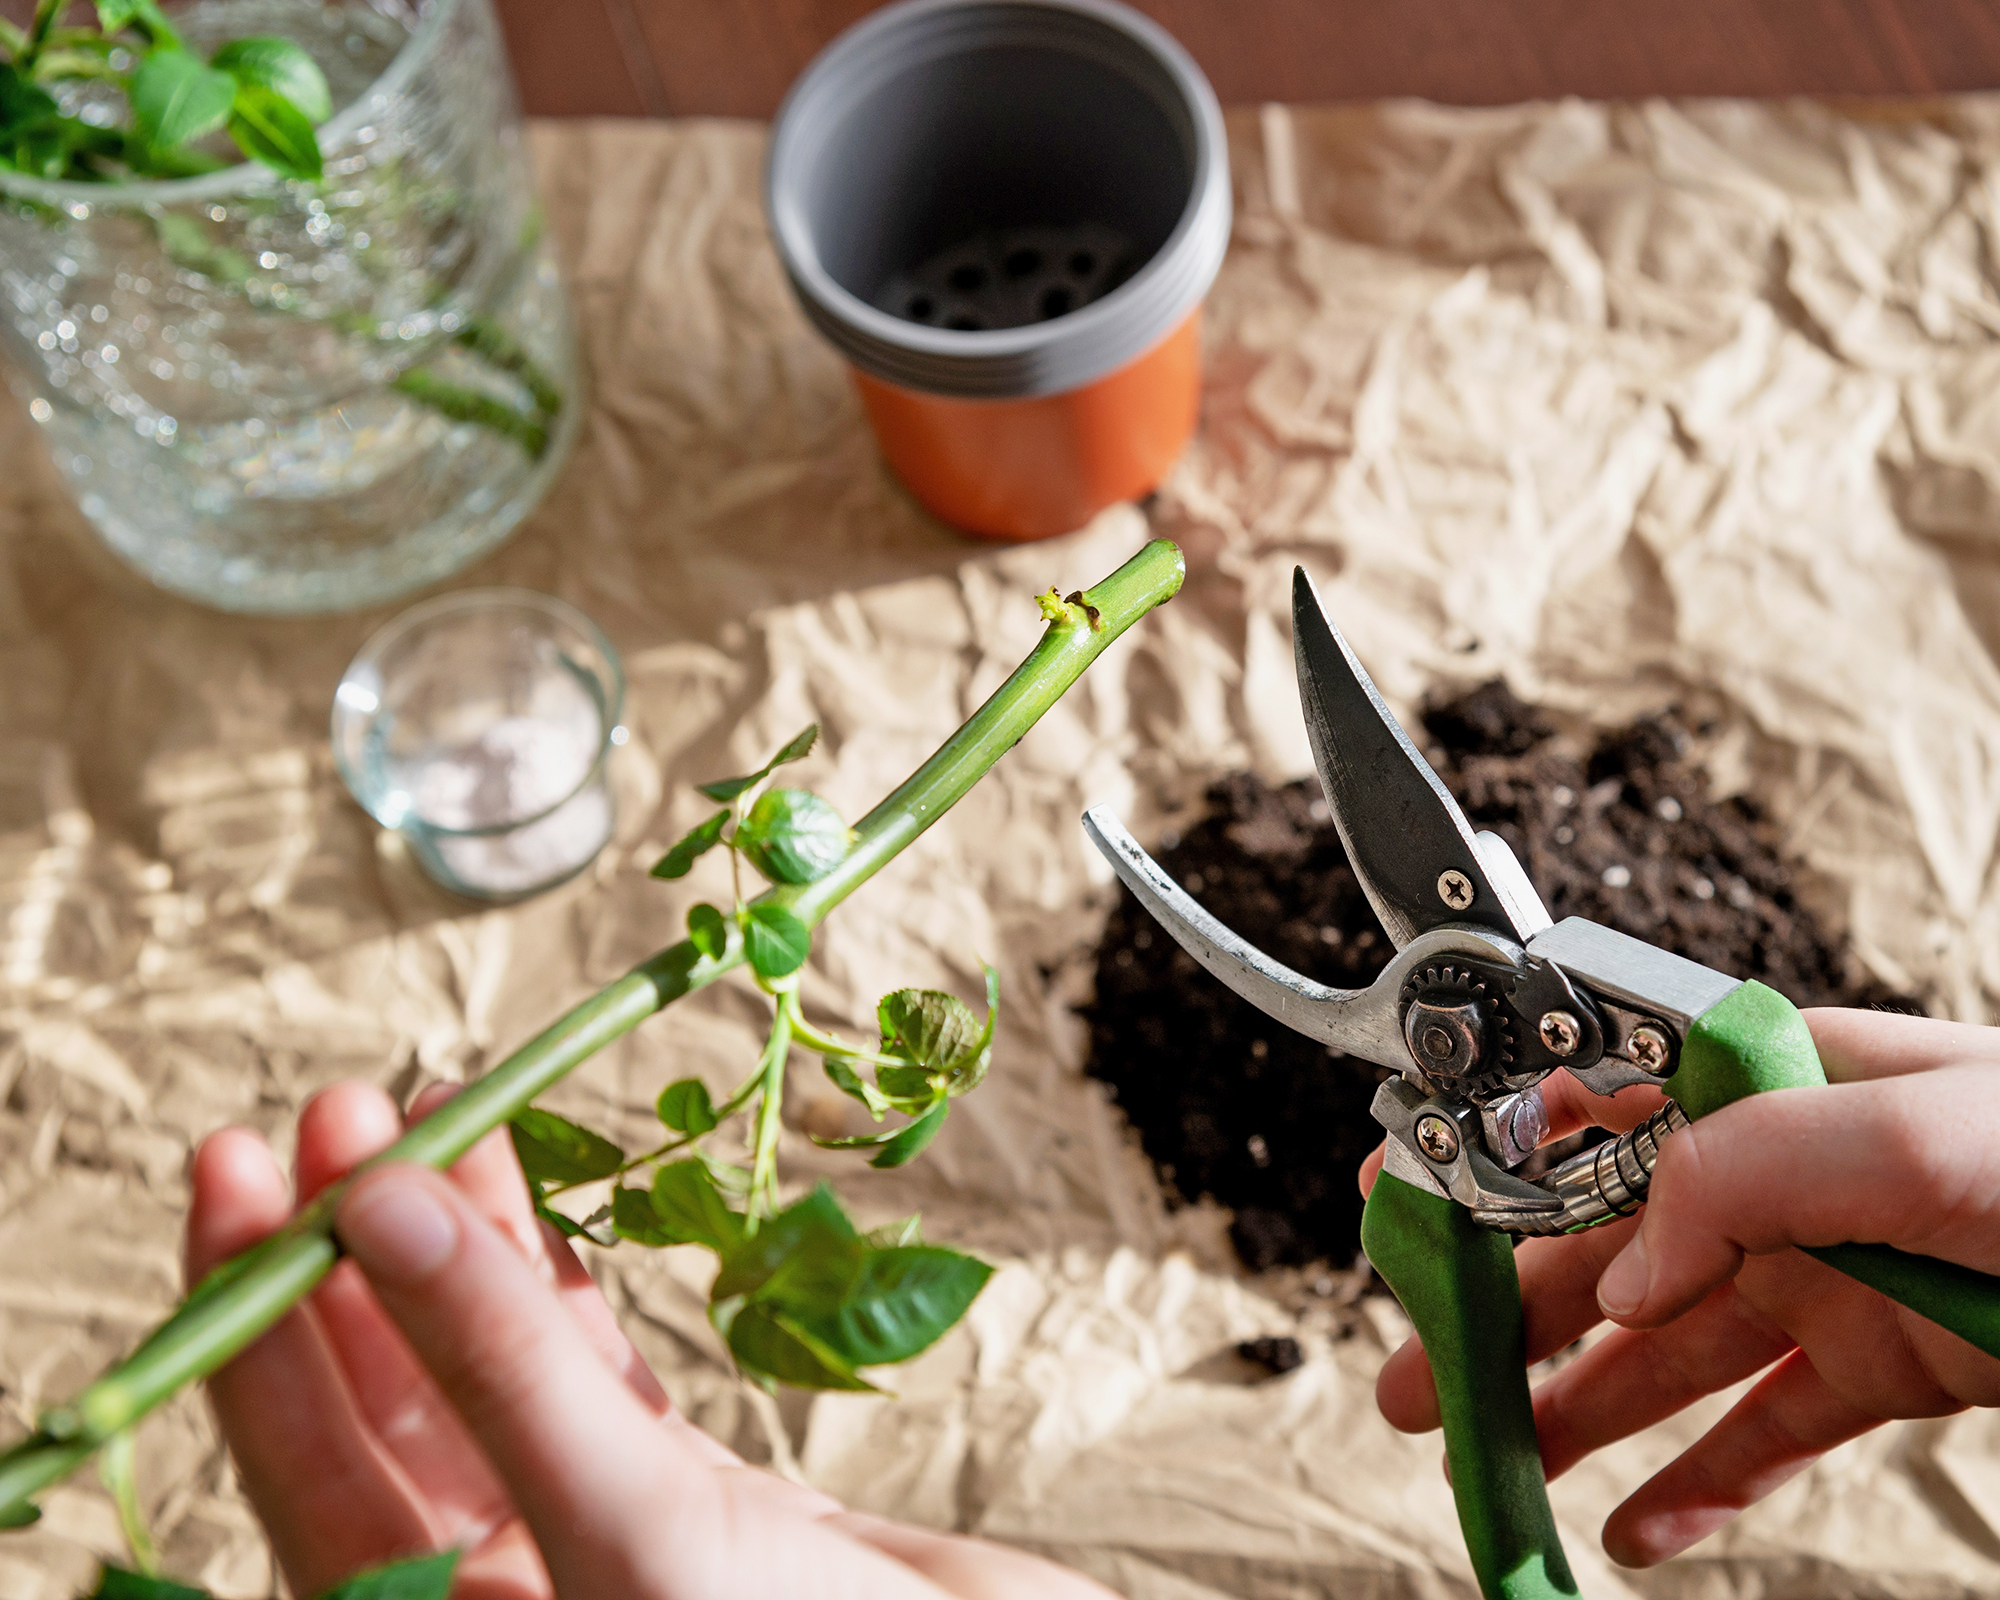
Trim each cutting at the top and bottom. Make the cut just above a budding point – or node – at the top of the stem, and just below one at the bottom. The top of the stem should be cut with a 45° angle, to aid water runoff, and the bottom should be cut flat.
Pull off all the leaves from the lower two-thirds of the stem – you only need to leave the top set, and even these aren’t critical. Remove any thorns at the same time by applying pressure to the sides. Wear thick gloves to prevent injury.
Using your hand pruners or a small knife, nick some of the nodes that will sit below the soil line: this will help to encourage roots to grow from those points.
An optional step is to dip the bottom of the stem in rooting hormone gel or powder. Many seasoned gardeners skip this step, as it isn’t strictly necessary. However, if this is your only shot at replicating Grammy’s cherished rose bush, then it won’t hurt your chances.
3. Pot Up Your Cuttings
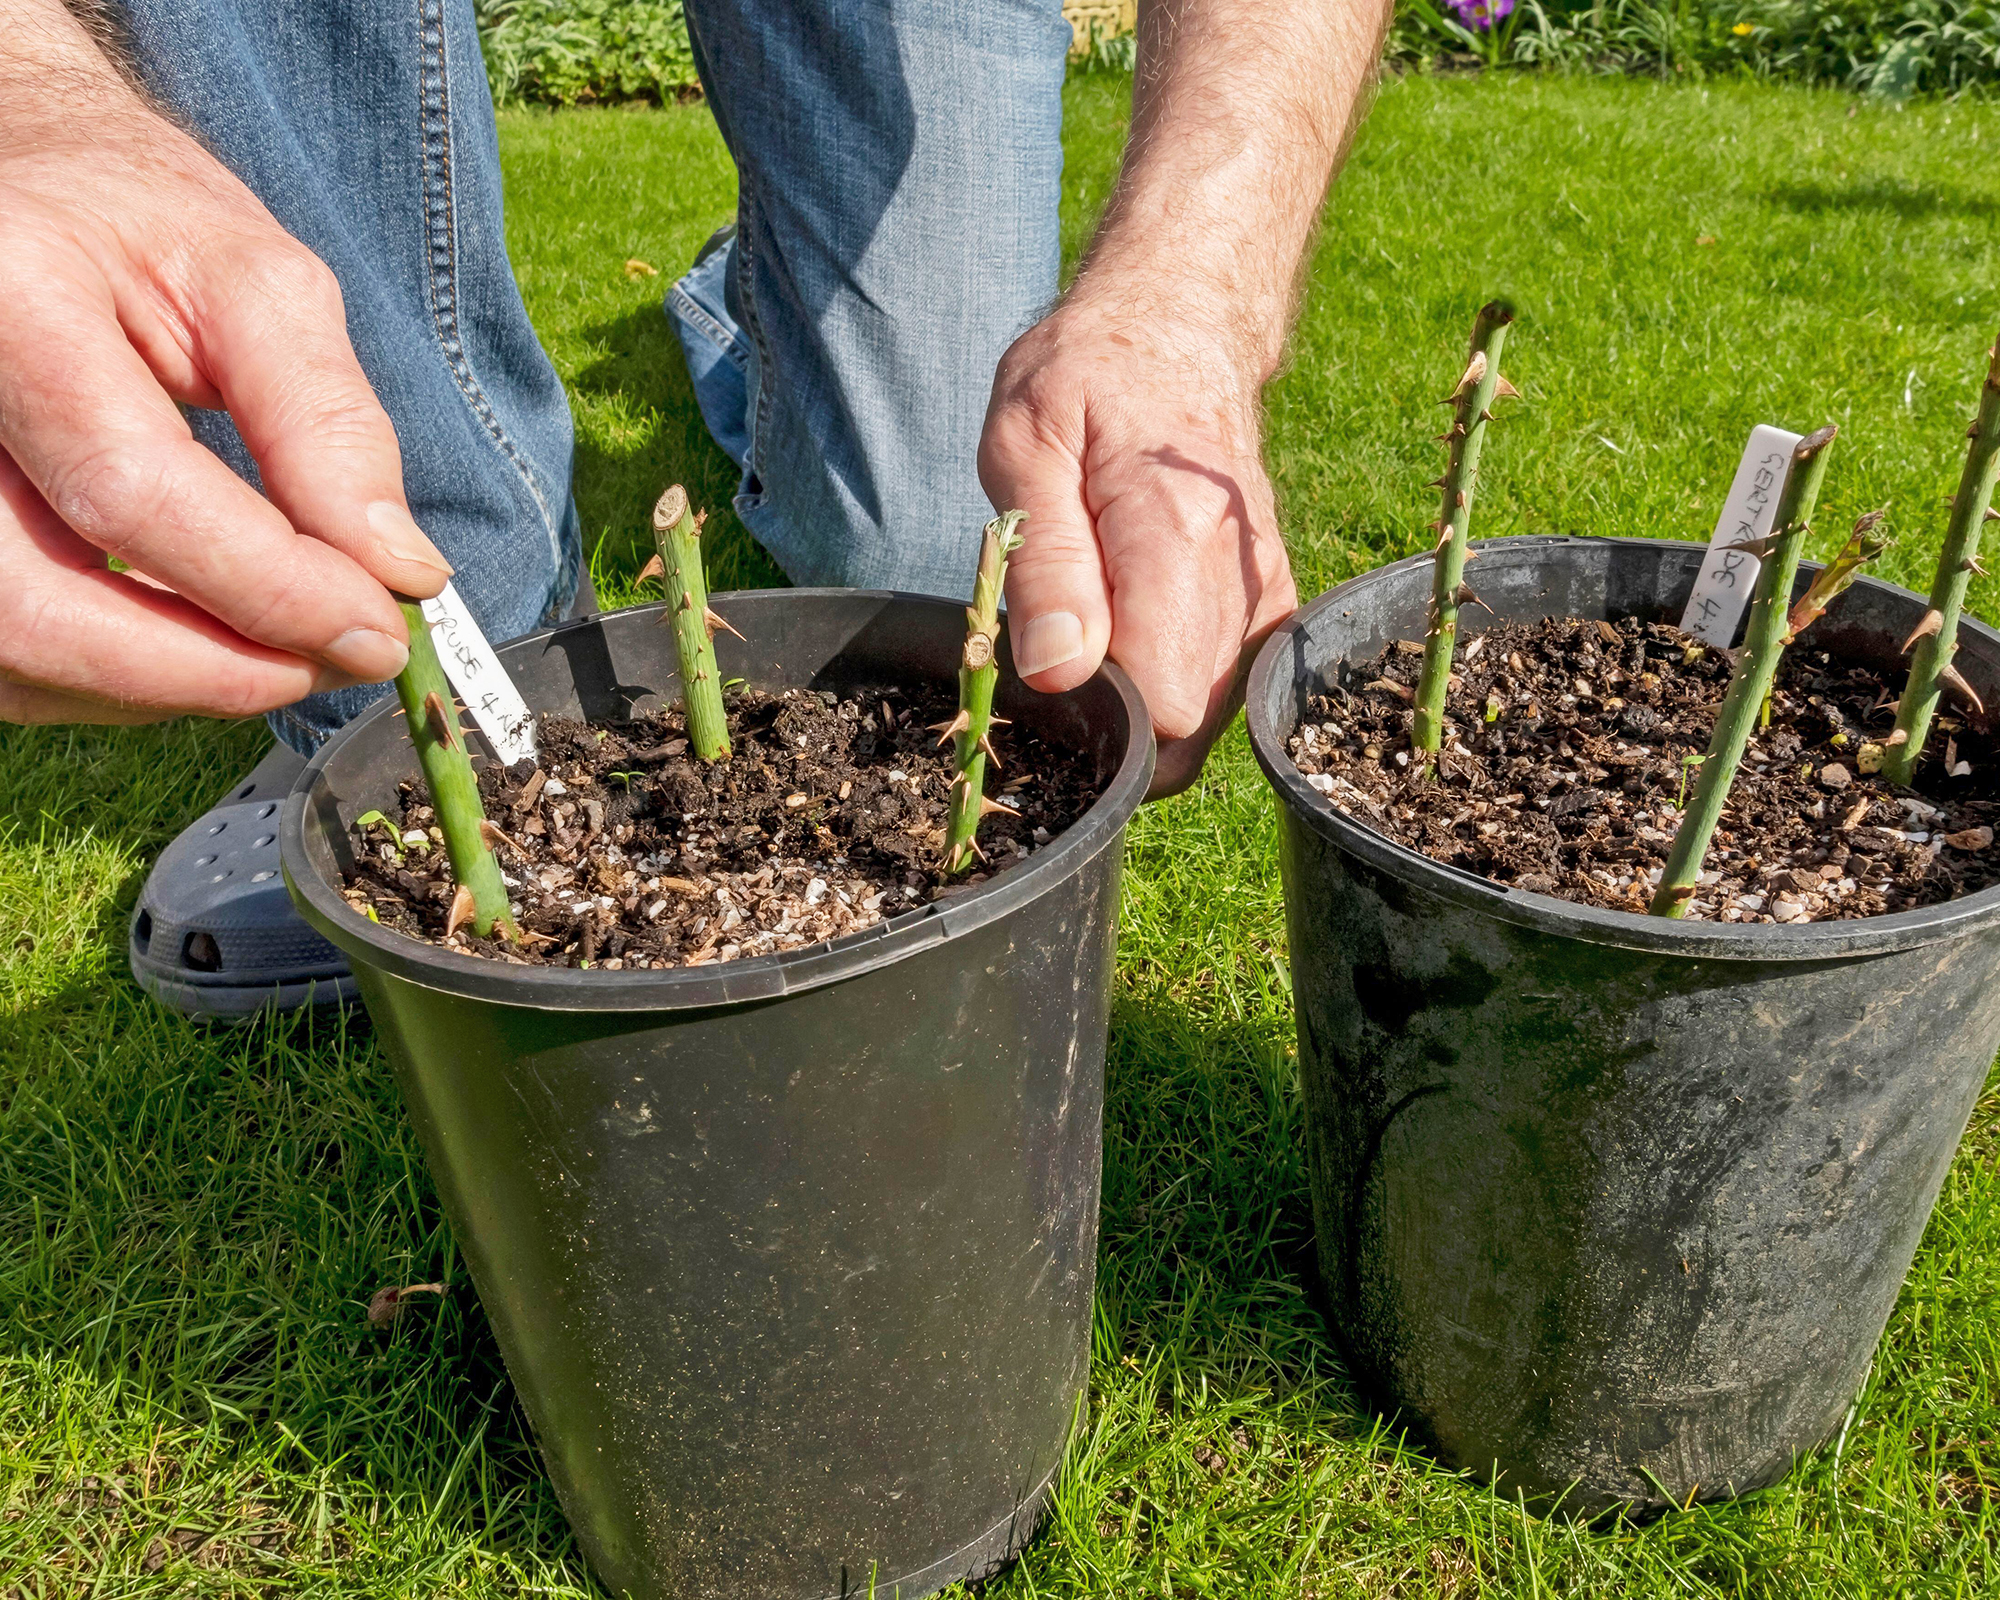
Choose a good-sized pot – a 1-gallon pot (3.8L) around 8 inches (20cm) tall is ideal for rooting three cuttings, or you can add five to a larger pot. Fill the pot with well-draining compost, with perlite or vermiculite mixed in. Water well before adding the cuttings.
Insert the stem most of the way in, leaving a short section with the top leaves above the soil line. Position the stem toward the edge of the pot, rather than in the middle, with three cuttings evenly spaced out in one pot.
Choose a protected spot that receives some shade from the midday sun. While not essential, you can partially bury the container in the ground, to keep it secure from winds and to help retain moisture.
4. Caring For Cuttings
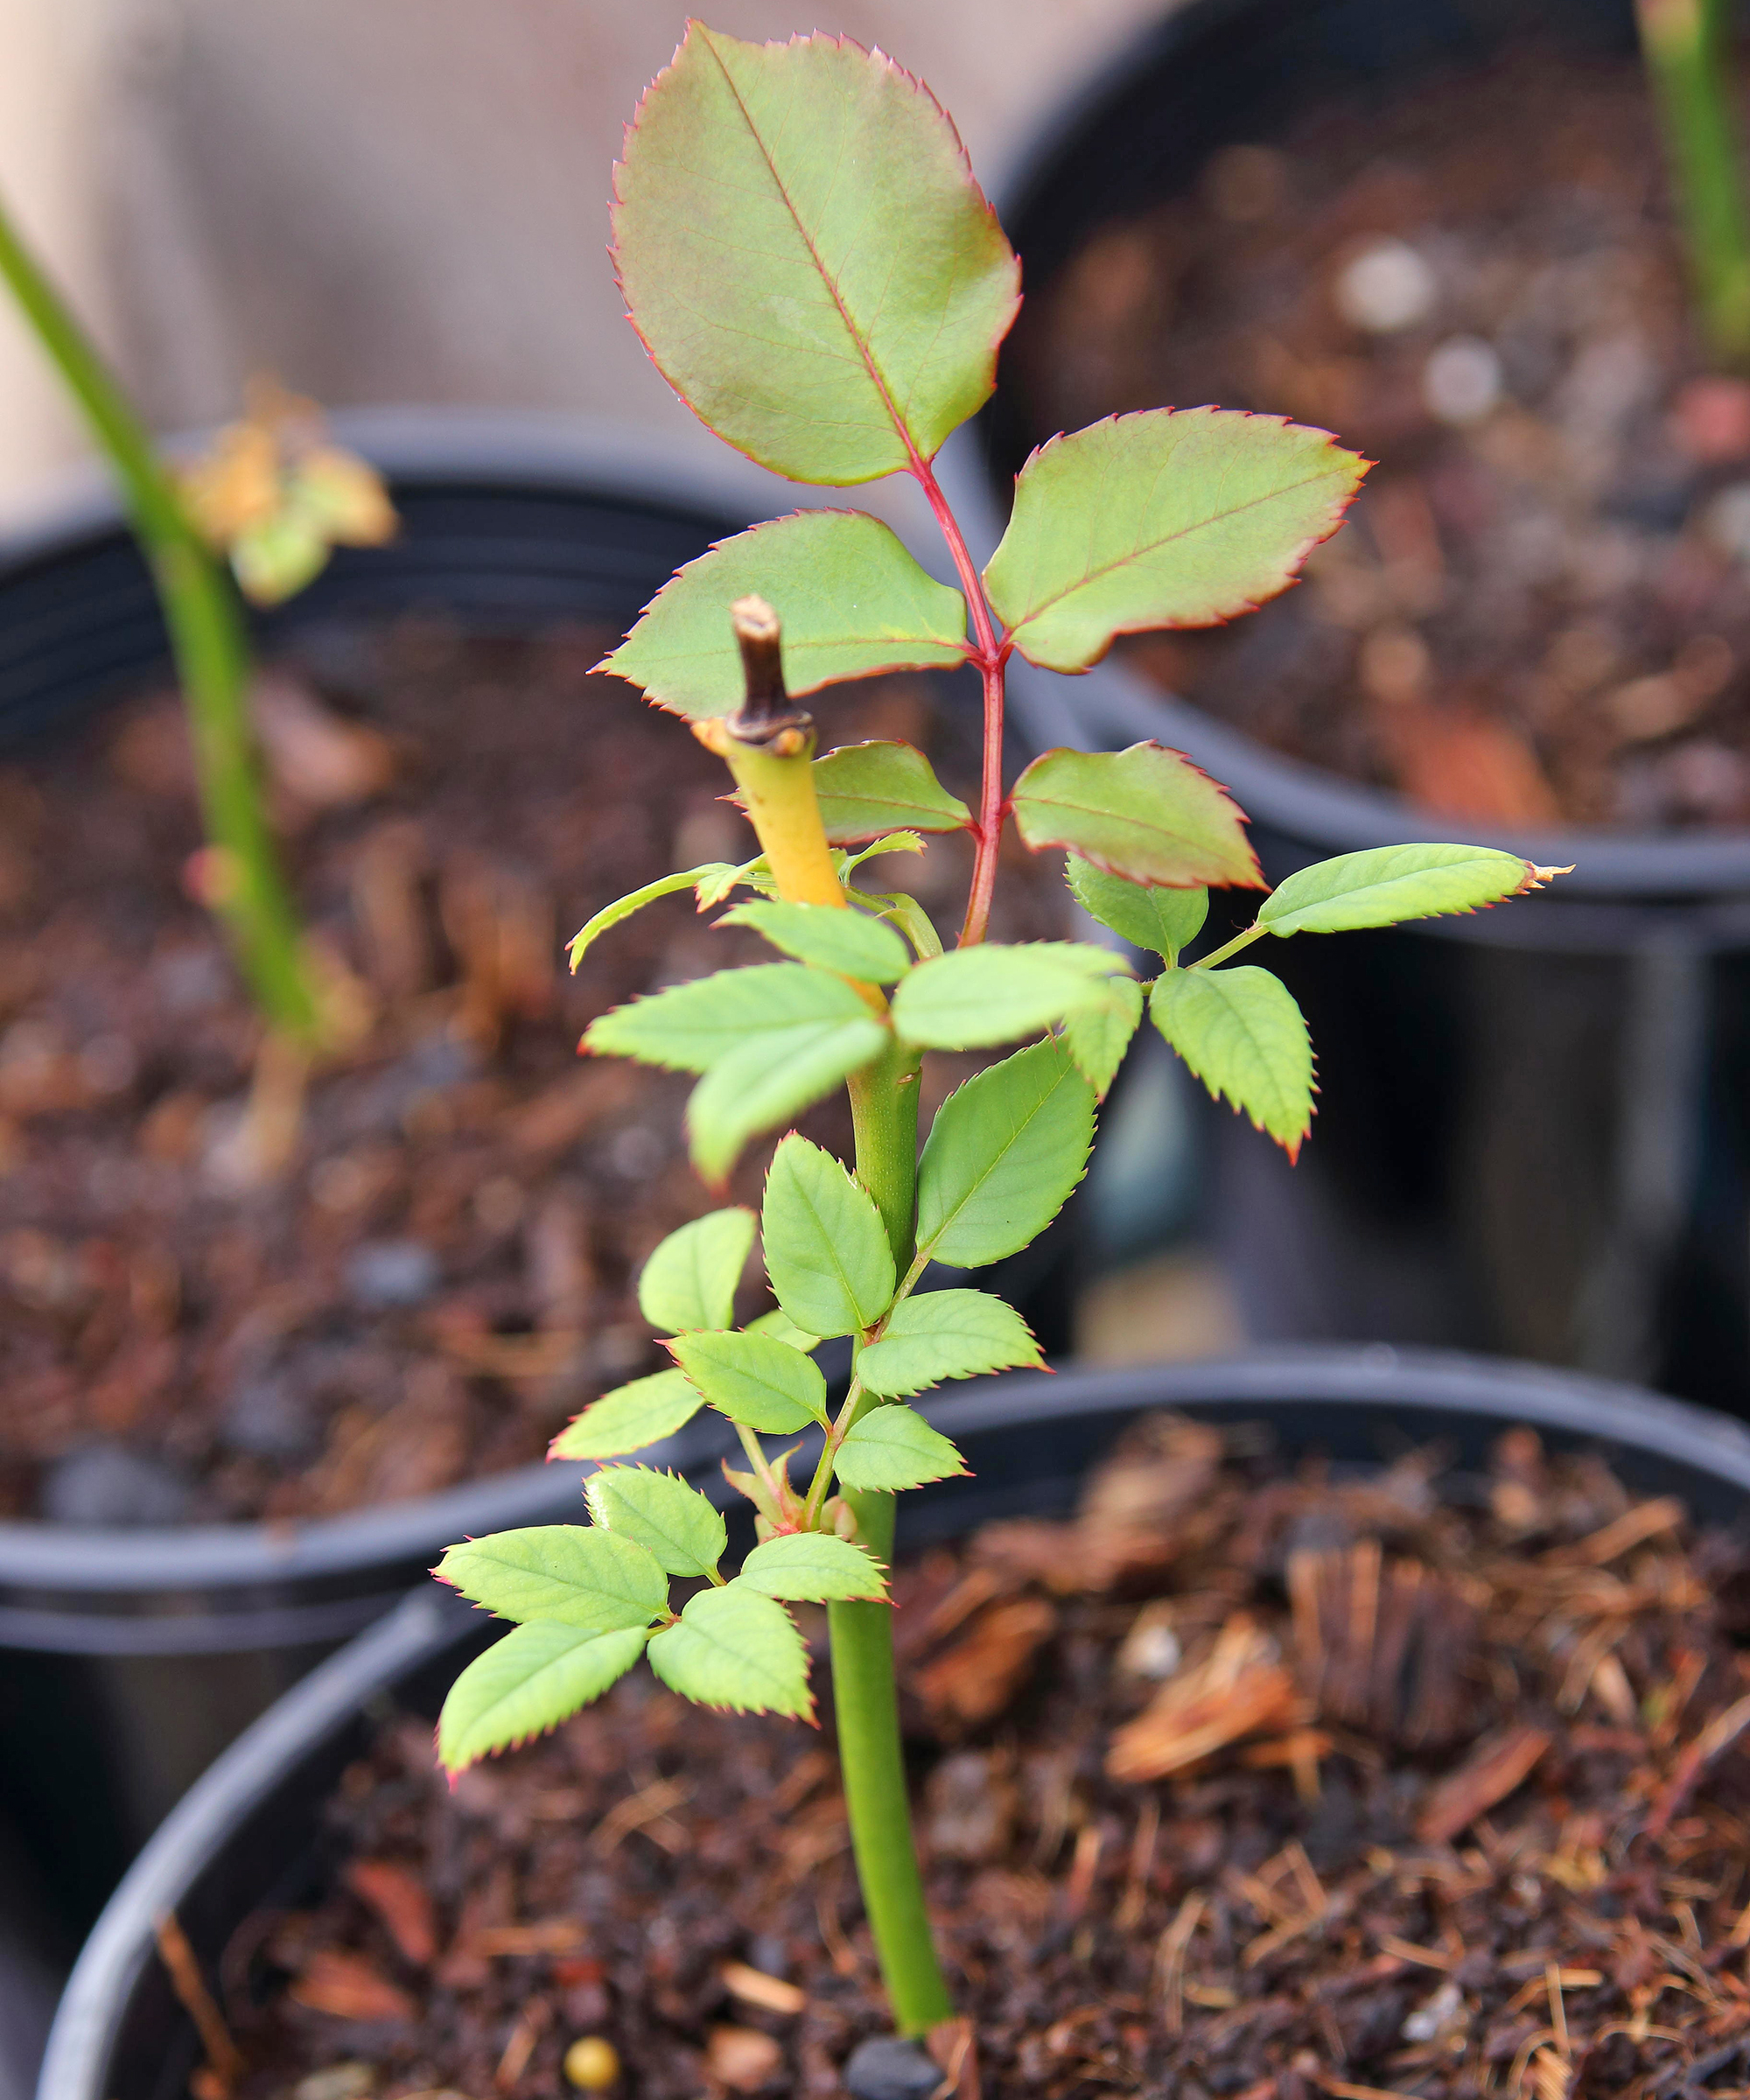
All you need to do to look after your cuttings is to ensure the soil doesn’t dry out, then wait for spring.
In around April, examine your cuttings. If they have been successful, they should have developed shoots at the top, and you may see roots coming out of the holes in the bottom of the pot.
Where there are long new shoots at the top, prune them back to about 2 inches (5cm). This will encourage the rose to develop new shoots from the base, resulting in a stronger plant. It is also one of the ways to make roses grow faster.
At this stage, you can repot your cuttings into individual pots. To do this, remove the compost mound from the pot and gently tease the cuttings apart, preserving as much of the roots as possible. Plant each cutting into a pot filled with well-draining potting mix and water well. Position in a sunny spot.
Once the cuttings have become well-established in their new containers, they are ready to be planted into their permanent position in the garden.
Enjoy watching your cuttings grow in beautiful free rose bushes!

Melanie is an experienced gardener and has worked in homes and gardens media for over 20 years. She previously served as Editor on Period Living magazine, and worked for Homes & Gardens, Gardening Etc, Real Homes, and Homebuilding & Renovating. Melanie has spent the last few years transforming her own garden, which is constantly evolving as a work in progress. She is also a passionate organic home grower, having experimented with almost every type of vegetable at some point. In her home, Melanie tends to an extensive houseplant collection and is particularly fond of orchids.