History Of Sprouting Purple Broccoli Plants

The broccoli we commonly eat in the United States is called Calabrese, and it matures rapidly over a longer season. Depending upon who you ask, Calabrese is not actually broccoli. Some purists tout sprouting varieties as the only true broccoli. One of the most popular is the early sprouting purple broccoli plant.
Sprouting Purple Broccoli Plants
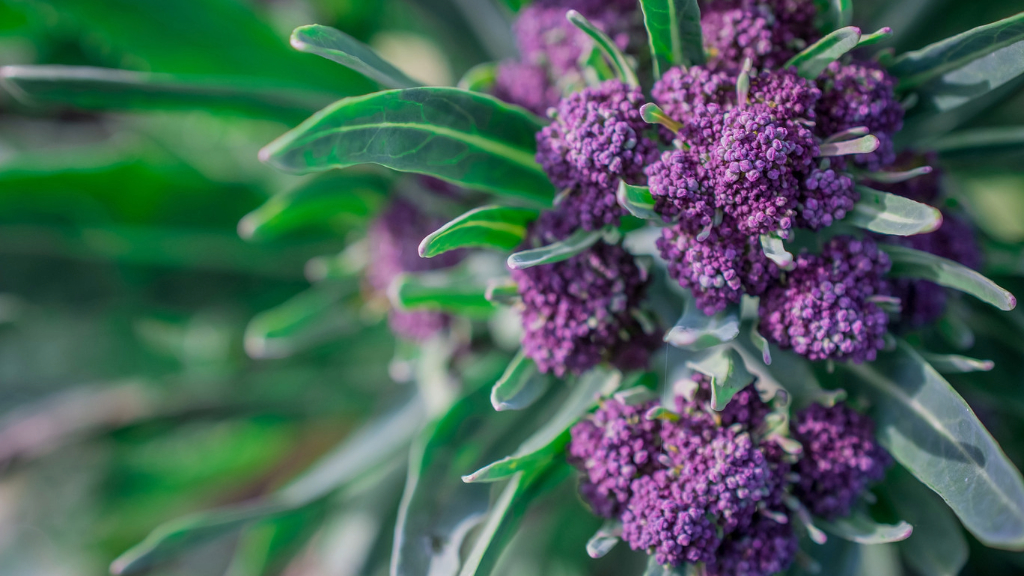
Early purple broccoli (Brassica oleracea var. italica) is an heirloom varietal that is popular in Italy and England. This beauty is extremely cold hardy, down to 15 degree F. (-9 C.). Unlike Calabrese, which is big, green and chunky, purple sprouting broccoli plants have small purple florets that are harvested individually. Broccoli was brought from the Eastern Mediterranean to Italy and was then introduced to France by Catherine de Medici upon her marriage to Henry II in 1533. It then made its way into Great Britain where it was referred to as "Italian asparagus" by the curator of the Apothecaries garden at Chelsea. By the 19th century, an abundance of colors could be found - from brown, red and cream varieties to green and white sprouting types. In the second half of the 19th century, Americans were planting purple sprouting broccoli. Early purple sprouting broccoli is a large plant, about 5 feet in height, with vibrant green stalks sporting effervescent purple florets. The stalks, leaves and heads are all edible. Leaves are reminiscent of mustard, while the stalks have a bit of an asparagus flavor. Early purple sprouting broccoli has a more intense flavor than Calabrese broccoli with a slight bitter edge that the kids might not take to unless you're a parent that eschews chicken fingers and carrot sticks.
Planting Early Purple Sprouting Broccoli
Early sprouting purple broccoli does best in USDA zones 6-9, and you should begin planting it in late summer to early fall. The plant needs a period of cold to produce the delicious florets that will begin to appear in the early spring. In areas without frost, you will likely end up with a big leafy behemoth with few, if any, sprouts. Prior to planting, work in plenty of compost or other organic matter. Space plants 15 inches apart and mulch around them to retain moisture. If the ground freezes or freezing temperatures persist throughout the day, cover the plants with a cold frame or row cover and mulch around the plants. The plants will be ready to harvest in about 200 days for up to 8 weeks.
Gardening tips, videos, info and more delivered right to your inbox!
Sign up for the Gardening Know How newsletter today and receive a free copy of our e-book "How to Grow Delicious Tomatoes".

Amy Grant has been gardening for 30 years and writing for 15. A professional chef and caterer, Amy's area of expertise is culinary gardening.
-
 Never Plant Seedlings Until They Pass These 3 Simple Tests
Don't be over-eager to transplant seedlings into the garden before they are ready. These quick and easy checks will help ensure flourishing plants.
By Mary Ellen Ellis
-
 Grow ‘Karl Rosenfield’ Peony Plants For The Ultimate Frilly Border Beauties And Cut Flowers
For frilly double magenta peony petals infused with a heady fragrance, grow ‘Karl Rosenfield’ peony plants. Here’s how to cultivate the ultimate plushy blooms
By Tonya Barnett