Grow Bags For Potatoes: Tips For Growing Potatoes In Bags
Grow bags for potatoes are an excellent solution for patio or small space gardeners. Learn more about planting potatoes in bags below.


The potato is a favorite and versatile food that's easy and inexpensive to grow. Traditionally, potatoes are grown in a big space, perhaps a sprawling garden on an impressive piece of land. While almost everyone loves potatoes, not everyone has a spacious backyard for a potato patch.
Home gardeners traditionally "hill" potatoes to encourage them to produce lots of roots and hence lots of tubers. This method takes some space and there is a high probability that you won't get all the spuds out of the earth when you harvest.
That’s where grow bags for potatoes come in.
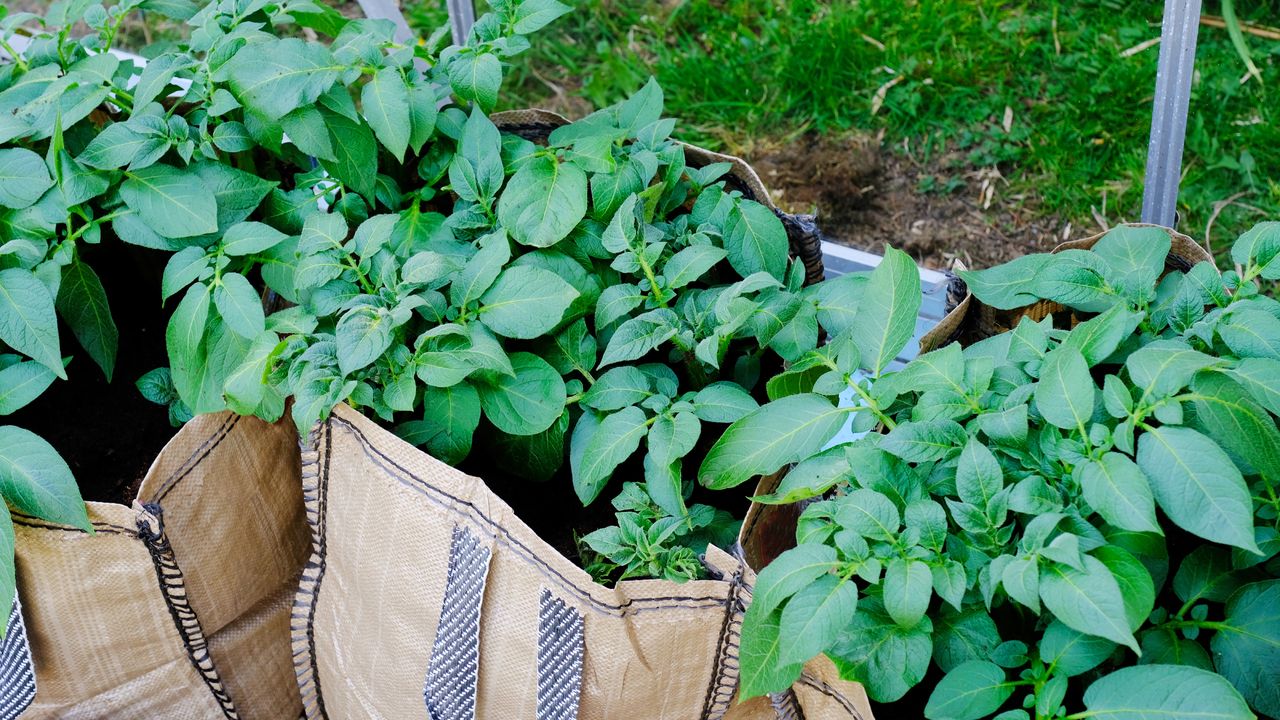
Grow bags are an excellent solution for patio or small space gardeners. You can make your own potato bag or purchase them. Learning how to grow potatoes in a bag will provide a space-saving solution, and it's a fun family project.
About Potato Grow Bags
Almost any vegetable can be grown successfully in a container, which is one reason container gardening so popular. While many have grown strawberries or cherry tomato plants in patio pots, fewer gardeners have tried growing potatoes in bags. It’s time to take the plunge.
There are many advantages to growing your own potatoes in a grow sack or bag. A potato grow bag takes up less space, doesn’t depend on good soil in your backyard, and makes those spuds easier to harvest. Best of all, it’s easy: all you need is a sunny corner, a grow bag, compost, and seed potatoes.
You can make a bag out of burlap, or even grow potatoes in a cardboard box. The container or bag lets the plant spread out its roots, and you can add layers of soil as it grows. The reason for layering is the same as hilling. Potato tubers send out roots at the eyes, which branch out in the soil. The more you cover the top of the root zone, the more roots they send out. More roots equal more potatoes.
Gardening tips, videos, info and more delivered right to your inbox!
Sign up for the Gardening Know How newsletter today and receive a free download of our DIY eBook "Bring Your Garden Indoors: 13 DIY Projects For Fall And Winter".
Most potato grow bags are 10 gallons. Five gallon bags are about the smallest you can get away with.
How to Make Your Own Potato Bag
The first thing you need to grow potatoes in bags is, of course, a bag. Here you have two choices: buying one of the different grow bags currently available in commerce, or making your own. Making your own bag takes more time but costs less.
The easiest bags are just old burlap sacks with the tops rolled down. You can also sew or staple together durable fabric or even weed barrier fabric into the appropriate shape. Leave enough fabric at the top to unroll as you hill the potatoes inside. You are not limited to growing potatoes in bags, however.
You can also set out an old tire and fill it with soil and seed potatoes. As the plants grow, add more tires. One easy method is to cut off the top of a bag of compost. Dump out all but the bottom few inches (8 cm) of compost and roll or fold the top of the bag down. Plant in the bottom of the bag, adding compost as the plants grow. Just be aware you’ll need to poke plenty of drainage holes in the bottom section.
Whatever container you decide to use, make sure to roll down the edge of the bag to make it much shorter for planting.
Planting Potatoes in Grow Bags
The ideal planting time for potatoes is about two weeks before the average last frost. Potato sprouts can handle a light frost, but a heavy frost or freeze will set growth back. If your plants have sprouted and a freeze is predicted, you can always move your bags to a protected area until danger of frost has passed.
While it's not essential, you may want to chit (or pre-sprout) your seed potatoes two to four weeks before planting. To chit your potatoes, lay them in a single layer in a warm spot with indirect light. A good way to prevent rot during this stage is to place your potatoes in egg boxes or seed trays. Once your potatoes put out shoots that are 1 inch (2.5 cm) long, they are ready to plant.
Mix potting soil and organic compost to prepare a growing medium. You can add a little granular fertilizer to the mix, but not too much since potatoes do not like rich soil. Moisten this soil, then put about 4 inches (10 cm) of the soil in the bottom of the bag.
Plant small seed potatoes whole, but cut larger ones into chunks the size of limes for planting. As long as a seed potato piece has one or more “eyes,” it should grow into a new potato plant.
Place the seed potato chunks – three to five per bag – on the surface of the soil, spacing them around evenly. Fill with just enough medium to cover the tops of the tubers. Keep the soil mix evenly moist and cover the sprouted potato greens with a compost mix as they come up.
Then place the bag in a site with at least six hours a day of direct sunlight, and step back and watch the potatoes grow.
Keep them covered and unroll the bag as the soil level rises. Once the soil is at the top of the bag, allow the plants to flower and die back and then dump out the contents so you can pick through and get all the spuds. You can also harvest young spuds early in the process. Growing potatoes in bags is a simple, no-fuss method that yields more potatoes and causes less harvest damage.
Caring for Potatoes Grown in Bags
Situate your bags in full sun and keep the soil evenly moist but not soggy. The young sprouts will not thrive in dry soil, and during the hot summer days you may have to water several times in one day to prevent dry out. The plant should grow vigorously and blossom during the summer.
Keep an eye out for pests, especially chewing insects which can affect the vigor of your plants. Occasionally unearth a small tuber and check for any damage to the young potato. If you use clean, new compost, you are unlikely to have any major soil-borne insect problems.
While grow bags take care of a lot of issues, potato plants do have a few other needs. New tubers must be kept covered by soil to prevent greening or sunscald.
As summer wanes, the plant's leaves will begin to wilt and turn yellow. At that point, the potatoes are ready to harvest. Harvesting potatoes is is easy -- just dump out the bag to see what your plant yielded. The potatoes may be smaller than they would have grown in the ground, but you are likely to have more of them. And besides, small potatoes are more tender and perfect for grilling.
Love Gardening Know How? Our latest book, The Complete Guide to Vegetable Gardening, is available now!
Perfect for the gardener in your life, or for your own coffee table, this book boasts 224 pages of high-quality pictures, expert tips, and easy-to-follow advice to get your vegetable garden growing its best. Look for it at these sellers, and wherever quality books are sold.

Bonnie Grant is a professional landscaper with a Certification in Urban Gardening. She has been gardening and writing for 15 years. A former professional chef, she has a passion for edible landscaping.
- Teo SpenglerWriter
-
 Warm Up Your Winter With Indoor Reds! 8 Red Amaryllis Varieties For Sizzling Seasonal Interest
Well loved as a bold decorative holiday bloomer, the red amaryllis is a hot favorite for winter displays. These red amaryllis varieties are guaranteed to fire up the season
By Tonya Barnett
-
 Should You Fertilize Houseplants In Winter? Expert Says Light Levels Are Key
Wondering if your houseplants need feeding this winter? An expert horticulturist reveals why light levels make all the difference. Find out how to get it right.
By Melanie Griffiths